Sunday, November 27, 2016

Picture of the well drill.

My wife's aunt found a picture of the truck before I pulled it from it's resting place. She was looking for something else when this picture jumped out at her. We are looking for more if there are any. This picture looks like is was just before they started drilling the well. You can see the guide wires coming off the sides and the top of the drill, and it shows the massive size of the drill. The head bit is leaning up on the back of the drill. To put a little perspective on this the wheels on the truck are 20in rims with 32in outside diameter tires, the tires on the drill were about the same. So I am guessing that just the drill head is close to 7ft long. The drill head that was laying there when I got the truck was too heavy to pickup with a good sized tractor. I hope we can find more pictures. I would love to have a better picture of the truck.


Sunday, October 30, 2016

polishing stainless bolts

As I look on line I couldn't find any posts on polishing stainless bolts. So here is how I polished mine. I went to Harbor Freight and bought a 1in by 30in belt sander to use to grind the letters off the bolts, I used a 80 grit belt at first until the head of the bolt was void of all letters and flat. Then I switched the belt out for a 120 grit and sanded the head flat and made sure all of the low spots and imperfections were gone. After that  I used 320 grit sheet paper on a flat surface to sand out the 120 scratches by hand. I know that doing it by hand is a lot more work but I found the end result looked better. there are other ways to sand the heads of bolts using a electric drill just make sure you don't over tighten the drill on the bolts and tare up the threads or to loose and spin the bolt. The problem I have with using a drill is that unless you a really careful it will leave circles in the head of the bolt. After the 320 grit I used 400, then 600 and finally 1200 to finish the sanding process. For polishing I first used 3M rubbing compound Perfect-it on a clean piece of paper and used one drop and rubbed it vigorously rotating the bolt a quarter turn periodically. After polishing with the Perfect-it I used a clean micro fiber rag to lightly buff the bolt to a shine. A few of the bolts I had to work back and forth on different grits of paper to work out small scratches but in the end I thought they turned out great!


Sunday, October 16, 2016

Back to dust

So I had a little time this week so I got three coats of feather fill on the rear end and a few other parts. Then I spent five hours sanding on the rear housing. At this point I think I might have gone a little crazy. To add to the crazy I sanded and buffed one of the stainless bolts for the rear housing cover, and now it looks like I will be pulling the bolts off the motor and doing them too. But it will look good when it is done. I coated the backing plates for the brakes and got them smoothed off. I used all of my epoxy primer so it is time for another gallon hope fully this is the last I will have to buy of the epoxy. All I need now is some more time so I can get the axles done and get them back under the truck. I have passed my time goal so I am a little sad but I figured I was wishing big. So new goal is to have the axles under it by January and hopefully the motor and trans in by march. Cross my fingers and hope.


Tuesday, September 27, 2016

I got the sand blaster out and blasted a lot of wheel and brake parts. I spent a hour or so cleaning and prepping to get the brake parts the rear third member and front wheels in epoxy primer. soon I will put a coat of feather fill on the rear end and get it slicked up a little then I will get color on them. I also changed the filters in my respirator goes to show you why you should wear one!


Sunday, September 18, 2016

 So I got the extra transmission apart and the gears look good. The top shift shafts were locked up but I have a spare top from the Texas truck. But that is not why I wanted this transmission the real reasons are it has the reverse lockout lever and rod I needed and a transmission brake. So first thing I cleaned up the transmission housing a bit, then I took it apart. It took me a while with a torch and a little elbow grease to get things apart. I got the the lever off and the rod and cleaned it up and installed it on the transmission I rebuilt. So now my next thing is to get to transmission brake off and rebuilt, then get it mounted on my transmission. So some times it is the little things that I get excited over. The Detroit transmission has a good grease hose for the throwout bearing!I got to watching ebay again I found and bought a spare water pump kit! so excited about that too!  I never thought I would see another.


Sunday, September 11, 2016

Okay I have been taking a little bit of time off from the truck, just to relax. So now it is back to work. A couple weeks ago I was contacted by a guy that had a B4 International and he needed a cowl and some other parts to his truck. So I struck a deal with him for some parts I needed that he wasn't going to use. And so last week I decided to go to him with my cowl from my Texas truck and the tie rod. We did some trading and I got a good headlight ring and a reflector for the headlight that was shot out on my original truck. And I got a whole transmission with a transmission brake. So Matt thank you for all you contributed to my restoration and the great trip to Detroit! So I talked my brother in law in to going with me to Detroit and we had a awesome trip no problems. Got there in great time met with Matt swapped parts and stories. Then we took a side trip to The Ford Museum. So thanks again Matt I am sure we will deal again. The trip back was awesome too. We stopped in Indiana for the night and ate at a great steak house called The Library best steak I have had in years! I also talked to a body shop in Bolivar Mo. I am supposed to bring him my fenders to get a quote. Here shortly I will have to get the finders and radiator shell done. I need to start back to work my two year goal has come and gone. I got a little curious after this last trip, just how many miles have I gone for this truck. So I did a real quick total so the trip to New Mexico was around 1750 miles round trip, 900 for the Texas truck, 750 for two trips to Kansas, And 1500 for the trip to Detroit. That is almost 5000 miles. And 3200 of that is just for parts.


Tuesday, July 19, 2016

So my Son and I went back to http://www.aths.org/ American Truck Historical Society. While he was looking at all the toy trucks they had to offer I got to looking for any thing I could find for my 1933 B3. I found quite a bit. Buy quite a bit I mean four sales flyers. For my truck that is a lot. I intend to go back and get full sized copy's of the flyers for display when the truck is done. The one thing I was super thrilled to find was a sales book on the reason you should buy a International B3 1 1/2 ton truck. This book lead in to details of the truck and why they built it the way they did. I also found several pictures in there catalog's that show me similar trucks and what they looked like. I will use these pictures for later reference for the cab top and a side mirror. I love the ATHS if there was not a place like this a lot of info would be long gone and people like me would have very little to go on to get a truck like this back to original. So if you like American trucks join ATHS show support to a great palace! So I also started mocking up a few things this week just to make sure I have every thing I need to put the chassis and dive line back together. I am still waiting on the rear end to get done the shop I took it to took it on as a special project since I was not in a hurry for it. So I might go back and tell them I am starting to need the third member in a week or two.The kids came out and helped me with the new rubber on the motor mounts and I got the front mount all done and in stainless.


Sunday, July 3, 2016

rubber

I found a local company that sells sheet rubber. So now I have new motor mounts. I spent a little time cleaning up the shop and rearranging a few things. So as soon as I get the rear third member back I can primer and  paint it then get it back under the frame. I took the wheels apart and got the rims off the spokes. I had someone tell me a cheaper place to get sand blasting media so next week I will be blasting the rims and wheels. My brother-in-law talked me in to taking apart the brake links and brake bars so I put my new blast media to good use. I also got new bolts for the brakes and motor mounts.  I got the sheet metal for the front motor mount and I am working on getting it hammered out.


Tuesday, May 17, 2016

Moving along.

 Okay I sent my cables off a week and a half ago and last night the new cables were delivered. (happy dance!) So this is turning out to be a busy couple of weeks. I got my brake cables, took my bearings to the 
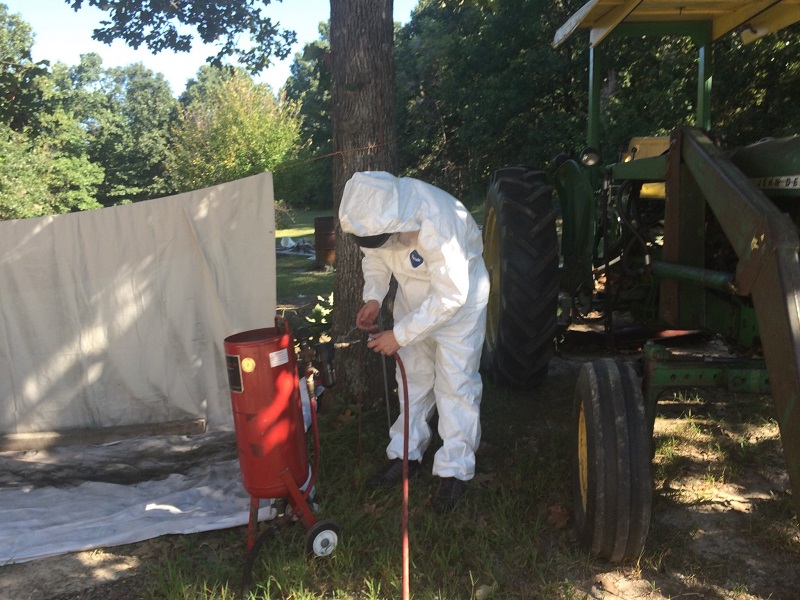
shop my differential is at, primed a few parts, found some matching hood latches on Ebay, And I started smoothing the parts I primed getting them ready to paint! The drive train shop I took the rear end to will have it done soon. So now I have four wheel bearings to get, they are on shelf   so no big deal. I will be a busy boy in the next few months. I have brake parts to sort. And  I really need to get moving on the wheels! I was really happy to find the hood latches they were so far the only hard to find part to the body that I needed. I only had one original to go off of for the hood latch so these are almost a exact match, they come off a WWII Willys jeep, works for me.


Sunday, May 15, 2016

Getting closer!

Alright bearings in hand time to get some painting done. I taped and prepped the rear end housing and got it epoxied.  I had noticed the front springs had a couple broken springs so I traded them out for the ones on the Texas truck. I blasted and epoxied them too, and the drive shaft. Had a couple runs I need to fix.   well soon as they dry I will put a little Feather-Fill on the rear housing and smooth it up a little then for a coat of red, polish up a bit a put it back under the frame. I get to start putting it back together! I sent the brake cables To Gorge Martin in Lebanon PA to have them rebuilt. So far he is the only person in the United States that will still rebuild brake cables, he also had a NOS set of rear cables with brackets that were for my truck so instead of making new I will get NOS for the rear. So with all this coming together I need to get a move on and get the wheels done. I have till this summer ish  to hit my goal. The first year get motor done. (check) Second year chassis done (.....) Third year body? Well we will see. I have a lot of red to paint, and I am ready to get rolling.